'Toberfest Contribution Guidelines
Edited: May 9, 2023
This October, Quilt is participating in two open-source contribution challenges: Hacktoberfest and Modtoberfest. If you want to contribute to Quilt as part of these challenges, thank you so much! We created this guide to help you make the best contributions you can, and maximise your chances of them being accepted.
Using Git and GitHub
While the workings of Git and GitHub are second nature to most developers, this year Hacktoberfest is accepting low or non-code contributions to count toward your total, so this section exists to give a basic overview of how they work, in case they are new to you. This is not meant to be an advanced guide in any way, merely an overview of the basics, so if you are already familiar with commits, branches, pushes, and pull requests, feel free to skip this section.
Setting up a GitHub account
GitHub is a service that hosts git repositories (that is, folders containing files tracked by git), so that people can easily download and work on them together. We’ll get more into how git works later, but the first step is to go to https://github.com/signup and create an account. Once that is complete, click your avatar in the top-right, and click Settings. There are a lot of settings here that you can dig through if you want, but there’s only a couple that need to be changed. Click “Email” in the sidebar and ensure that “Keep my email address private” and “Block command line pushes that expose my email” are both ticked. This is to ensure that you don’t accidentally leak your email address, as all git commits must include an email address, but with these settings enabled, GitHub will by default give you a public address to associate your commits with, and stop you from accidentally uploading commits that use your personal email.
Forking a repository
If you find a GitHub repository that you want to contribute to, the first step is to fork it. This will create a copy of the repository that you can control, so that you can safely make your changes without affecting the original repository, before submitting them to be added back to it using a Pull Request (more on that later). Forking a repository is easy, just go to the repository you want to work on, and click the “Fork” button in the top-right. In the next screen, leave everything as default, and click “Create fork”. After GitHub thinks for a few seconds, you’ll be brought to a copy of the repository that’s controlled by you, and your fork will be ready to use.
Using github.dev to make your changes
Installing and configuring git on your local machine can be a complex process, but if you’re not making any complex changes (for example, if you’re writing documentation or doing translation), it can be easier to use github.dev, which is a near-full featured version of the Visual Studio Code editor that runs in your browser. All the commits you make are sent directly to GitHub, so there’s no need to run git locally. To use github.dev, all you have to do is visit your forked repository and press the . key on your keyboard, and you’ll be taken to a VSCode instance running in the browser, with your repository opened and ready for editing. To keep following this guide, skip down to “Commits”.
Installing git locally
If you would prefer to work locally, there are several ways you can install git yourself, depending on your operating system:
Windows
You can download Git for Windows from https://git-scm.com/download/win
macOS
Apple include git in their Xcode Command Line Tools, which you can download by opening the Terminal app and typing xcode-select --install. Note that this comes with a lot of other tools, which won’t do any harm, but may take up space on your computer that you’d prefer they didn’t. If you have Homebrew, you can install it by running brew install git in the Terminal.
Linux
If git was not included with your distro, you will almost certainly be able to install it using your package manager of choice.
Installing GitHub Desktop
Git is designed to be used with the Terminal, but if you’re not a developer, that can be intimidating, so instead we will use GitHub Desktop to set everything up for us. There are many text editors and IDEs that come with git features built-in, like Visual Studio Code, which powers github.dev, but we will use GitHub Desktop as it works with almost any text editor that you might want to use. Download it, install it, and use your GitHub name and email to set up git when it asks.
In the screen that next appears, search for your forked repository and click “Clone” 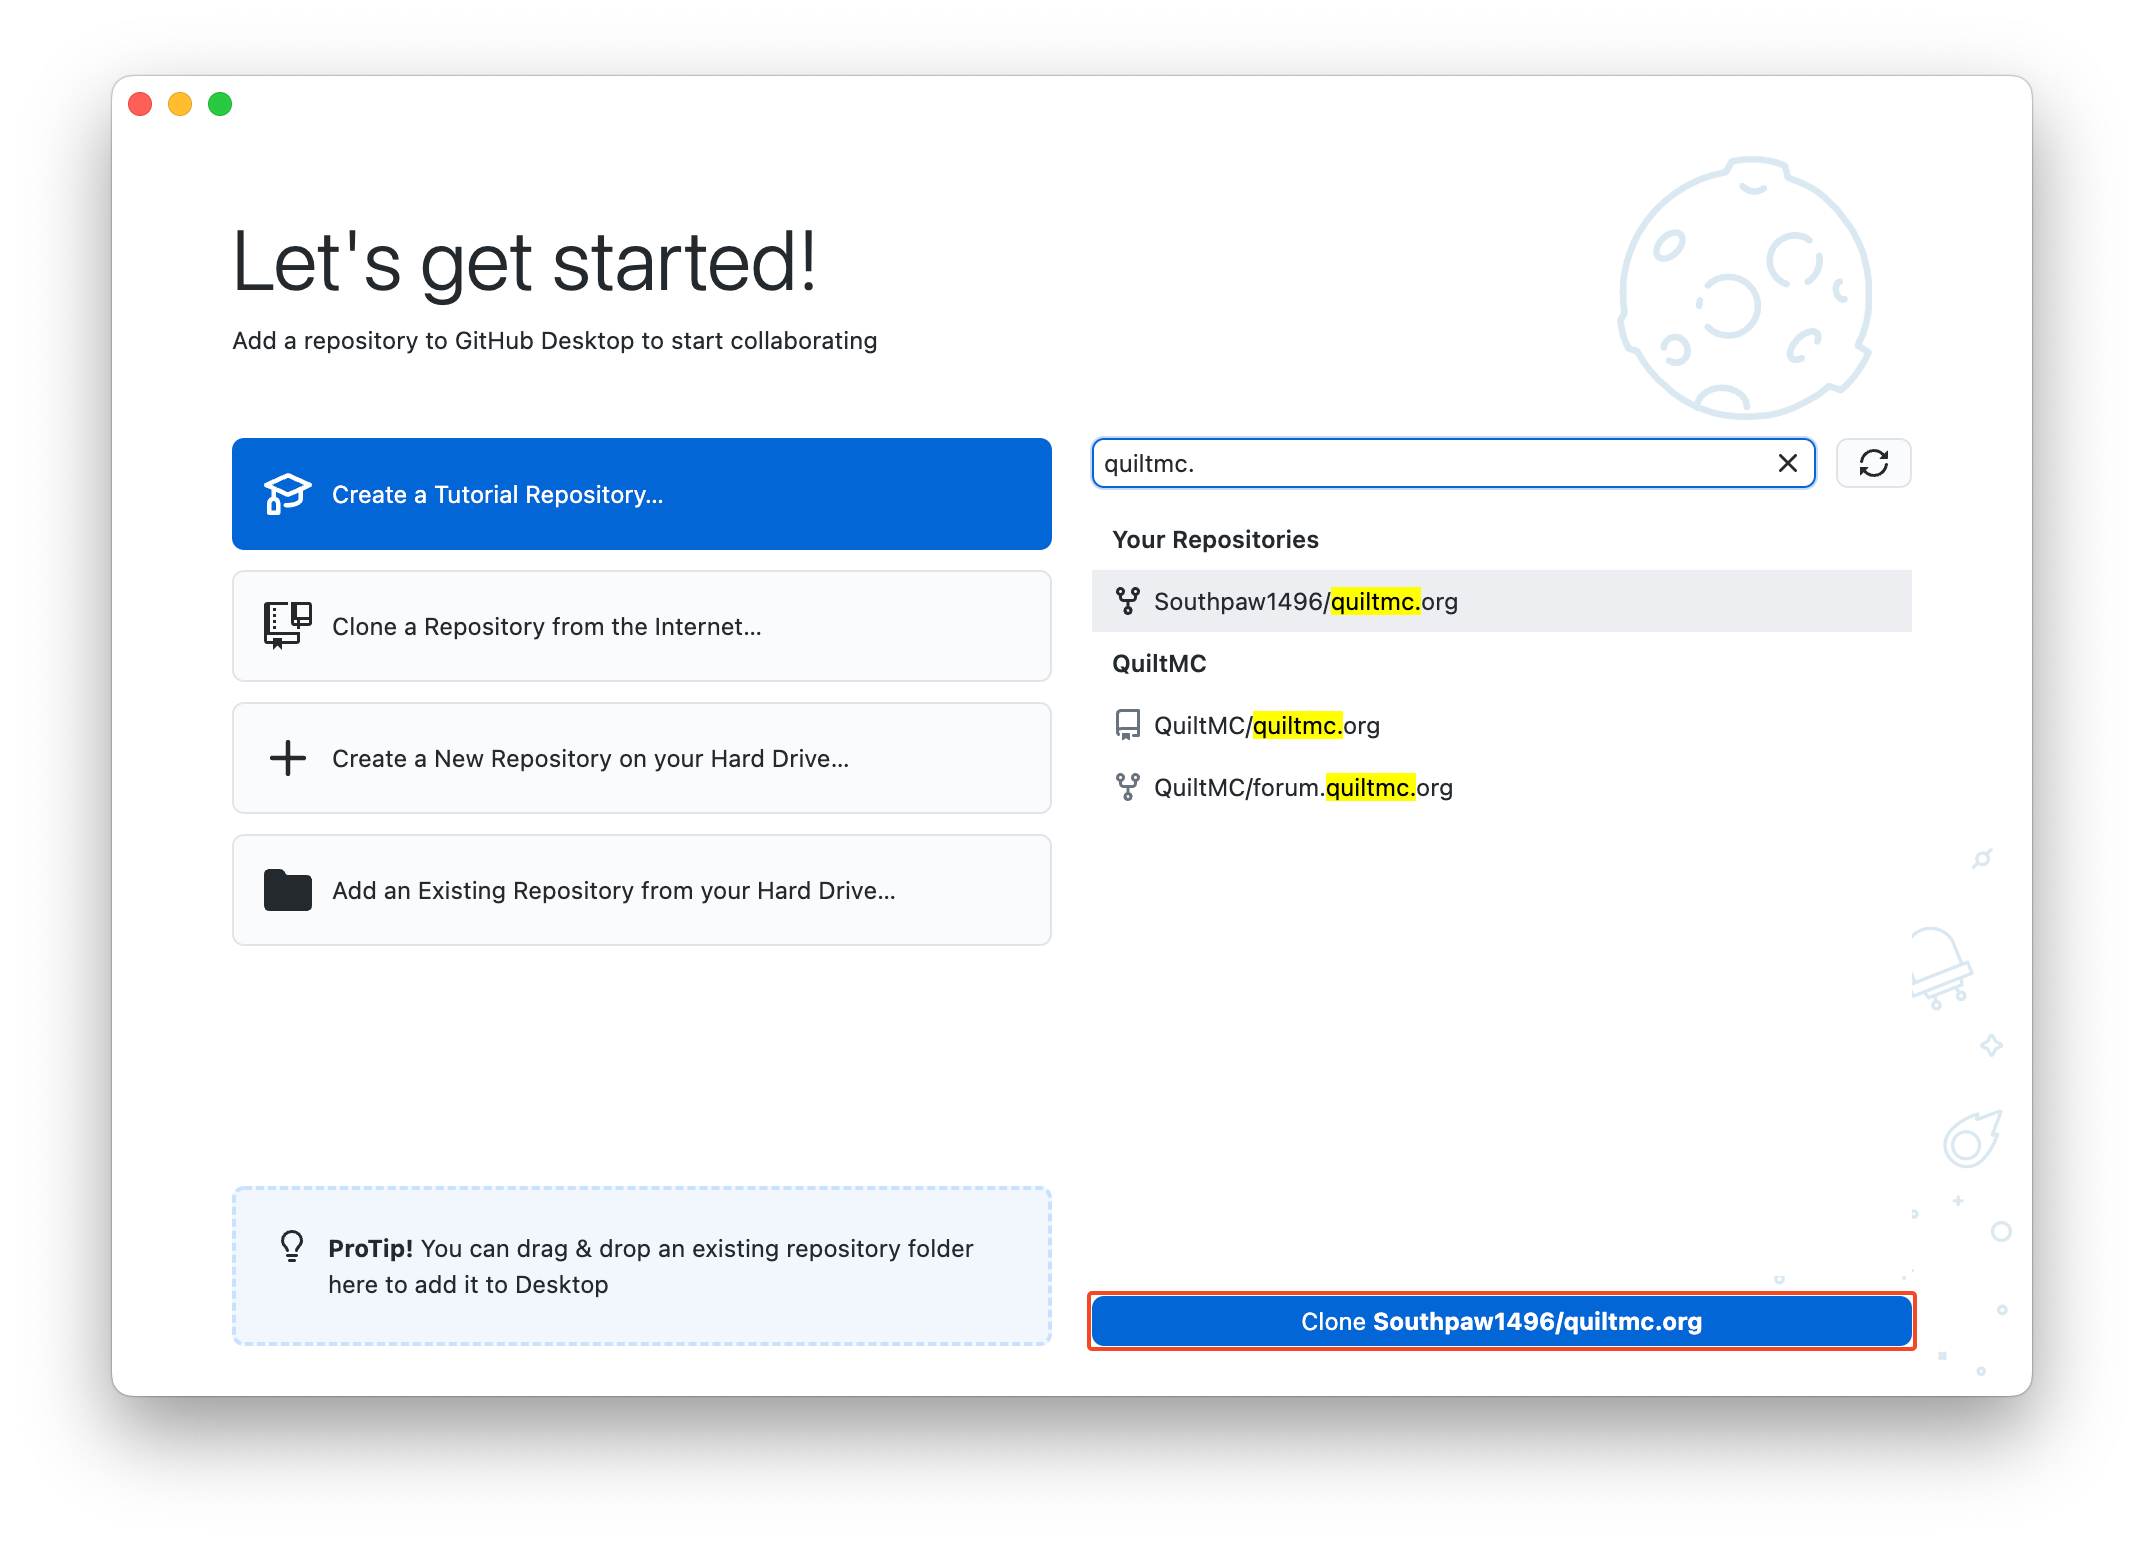 Make sure you’re happy with the Local Path of the repository, and click Clone.
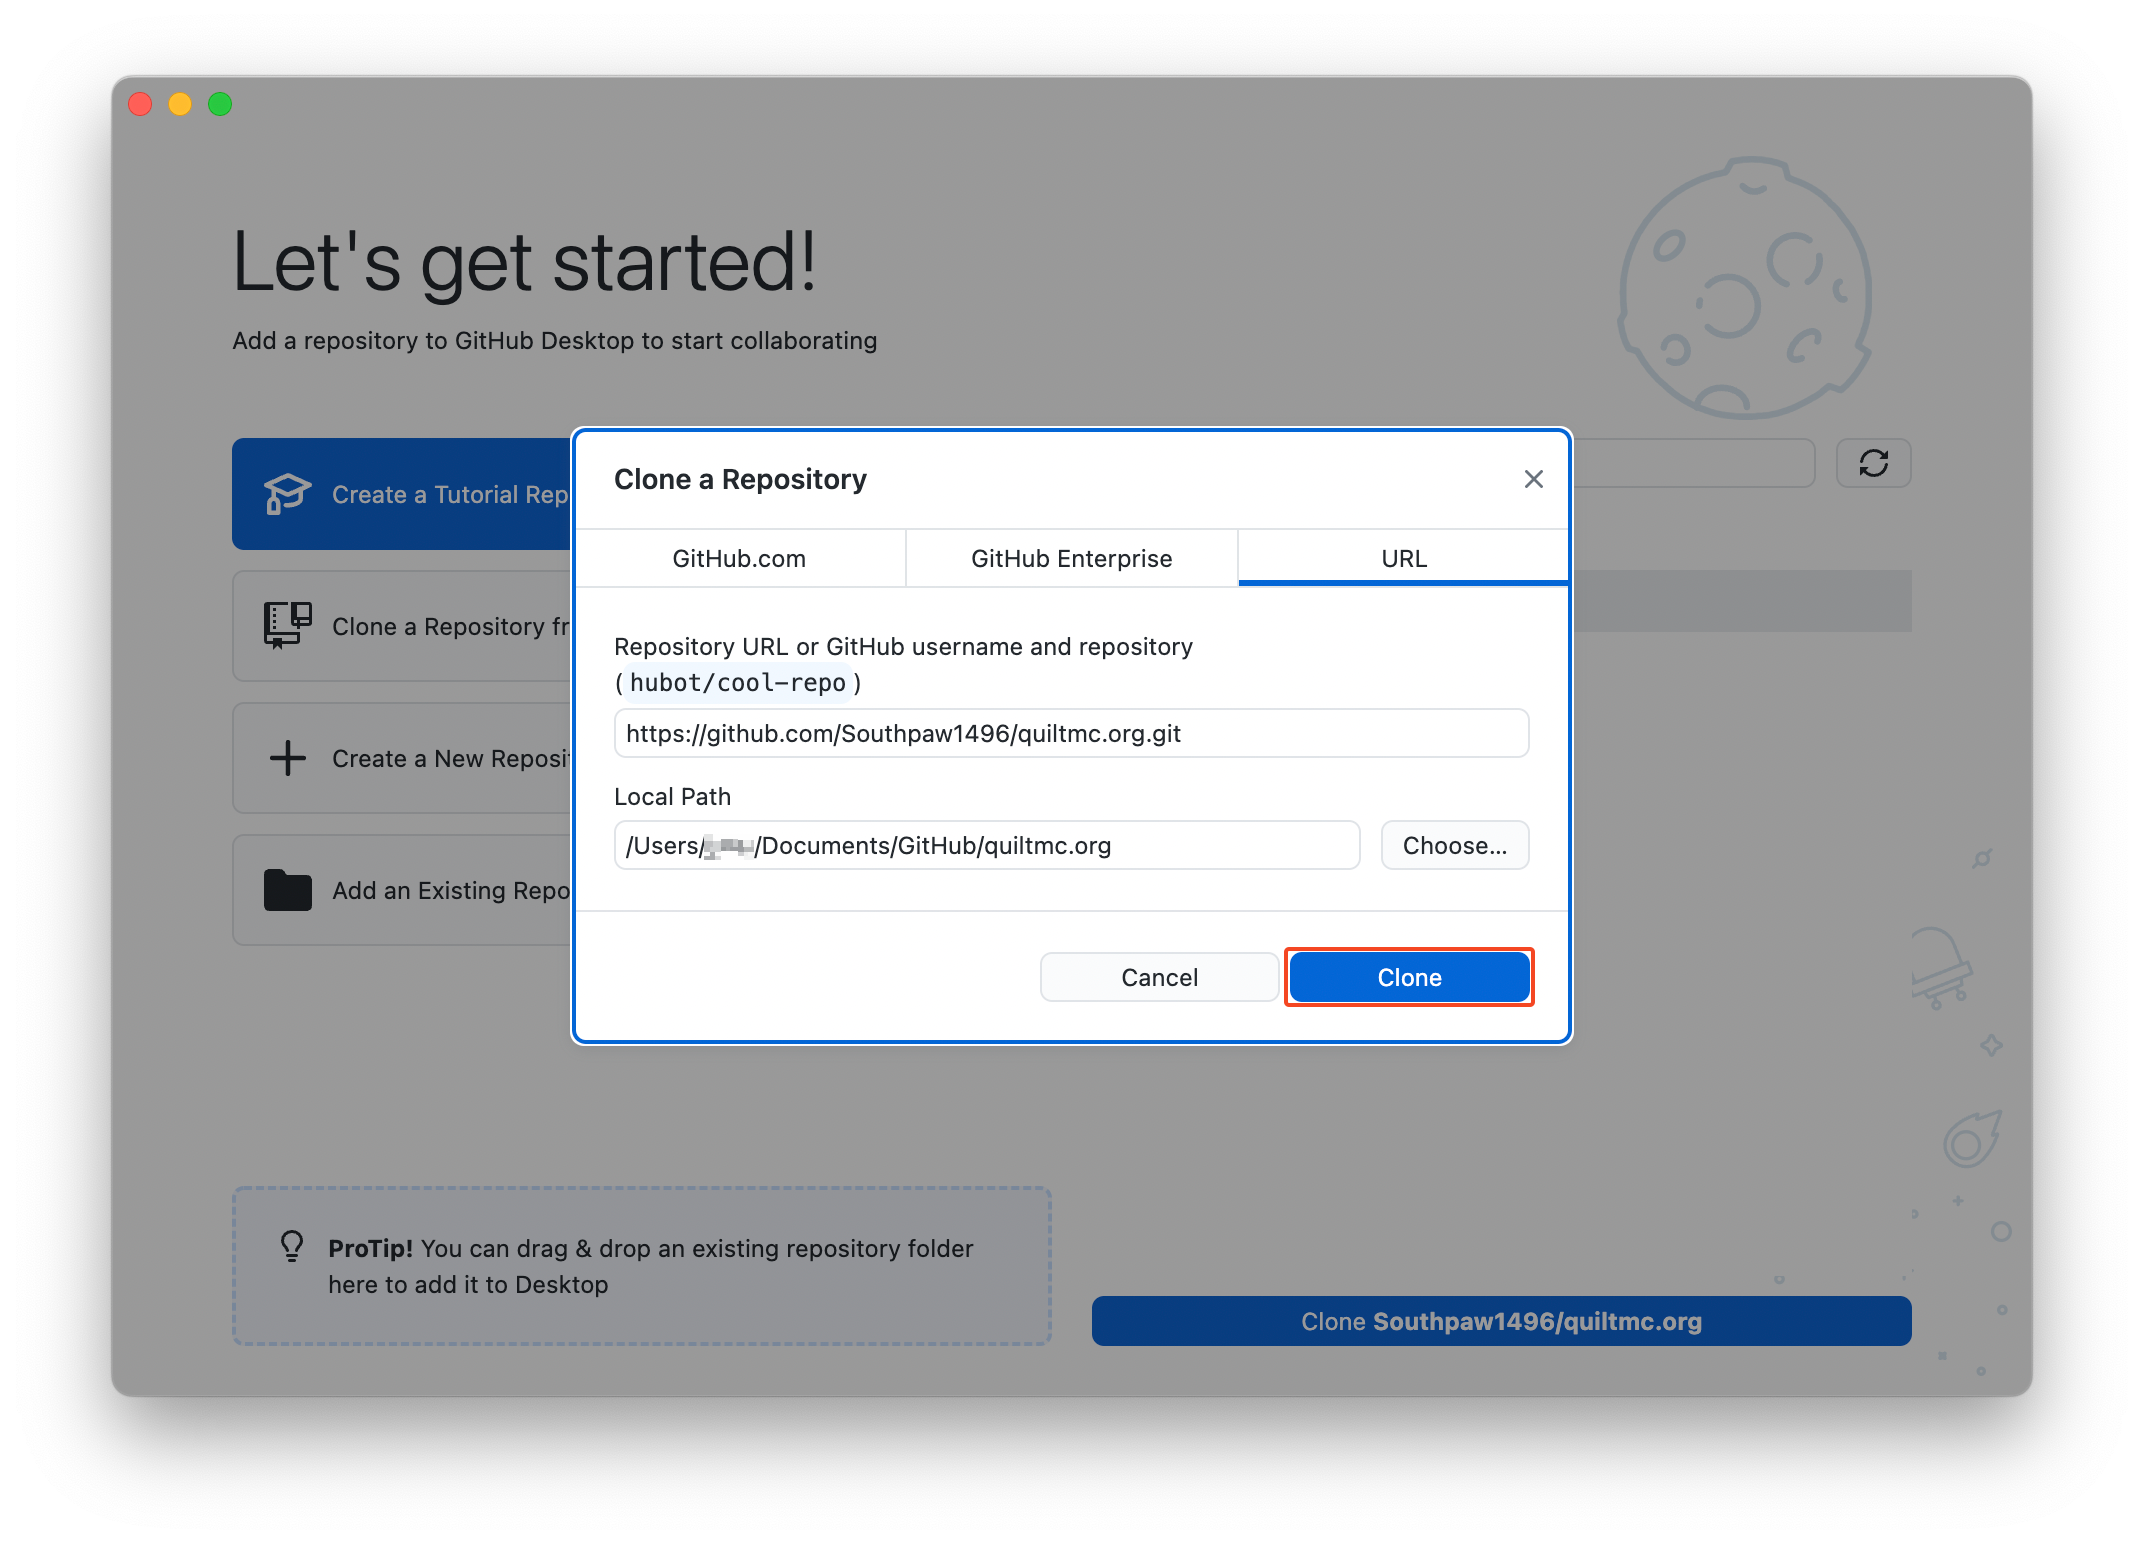
Commits
Commits are the fundamental building blocks of git. Each one represents a snapshot in time, and the real power of git comes from the fact that the repository’s entire history, from the first commit to the last, is stored within it. With the right knowledge, you can go back to any point in time and see what the repository looked like, and nothing is ever truly lost.
Every time you make a change to the repository, you need to commit that change. Don’t worry that you’re making too many commits, as they’ll all be “squashed” into a single commit when they’re added to the main repository. When you make a commit, you need to write a commit summary, and, optionally, a commit description if you feel more detail is required. In GitHub Desktop, commits are on the left-hand side of the window, along with a list of all files that will change in the commit.
Commit messages are conventionally written in present-tense, for example “Update the site information” rather than “Updated the site information”. This is because commit messages are not seen as a record of what has been changed, but rather, how the commit changes the repository. While this might be hard to adapt to at first, it’s a good habit to develop for when you’re working with other people.
It’s a good idea to “push” or upload your commits up to GitHub every so often, for example, whenever you take a break from working. This ensures that if you ever lose or somehow damage your local copy of the repository, you still have a relatively up-to-date version that you can fetch from GitHub whenever you need to. In GitHub Desktop, you can click the Push to Origin button at the top of the window to push your changes.
If you’re using github.dev, the Commit menu is in the sidebar below the search magnifying glass. There’s no need to push your changes, as they’ll be automatically sent to GitHub.

Branches
Another key concept of git is branches. At its core, a branch is a path of commits that have at some point been split of the main branch (which you could think of as a trunk) and continued on independently. This is useful in situations where you want to make changes, but don’t want to put the files on the main branch at risk of damage, so you can create a branch to keep on working without affecting the main one. In the quiltmc.org repository, for example, anything that is committed to the stable branch (which is the main one) is automatically published live on the main website, so we always make sure to develop and test new pages or features on other branches, before sending the changes to the main branch.
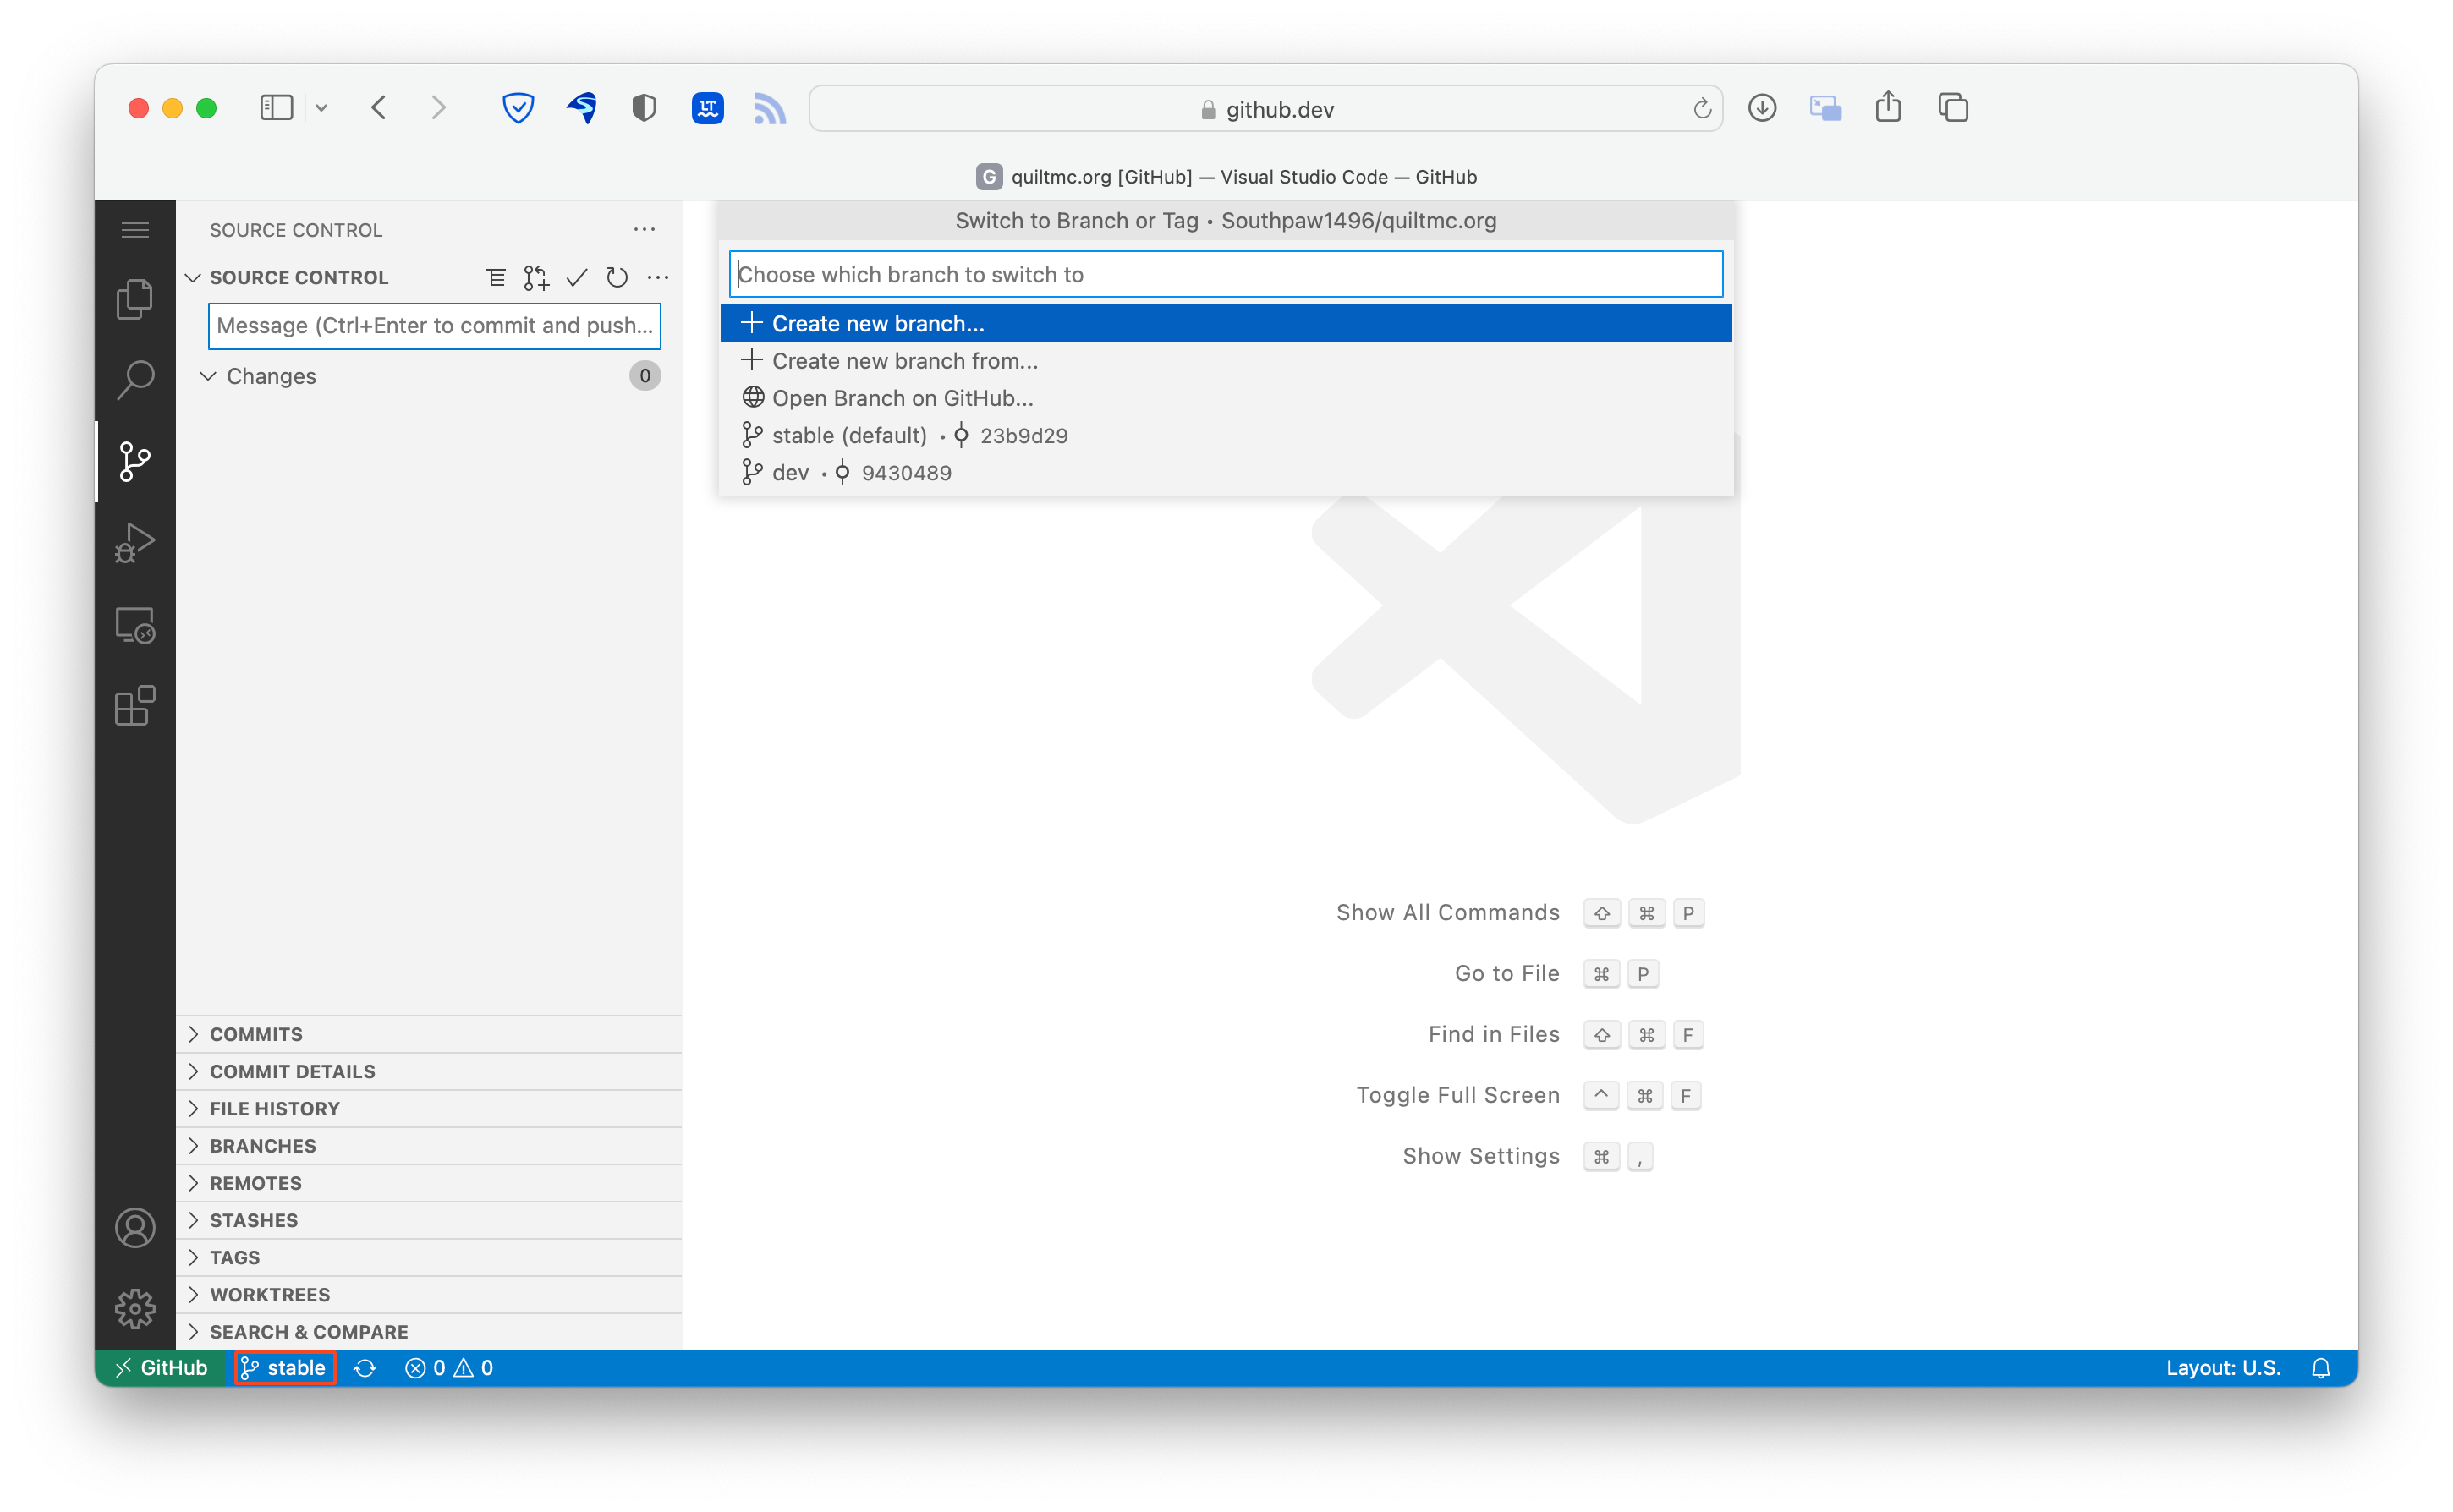
When making changes to a fork that you intend to send back to the original repository, it is good etiquette to create a branch for yourself to work on, rather than committing to the main branch. To do this in GitHub Desktop, click the “Current Branch” button, click “New Branch”, name it, and click “Create Branch”. You will be automatically switched to the new branch. 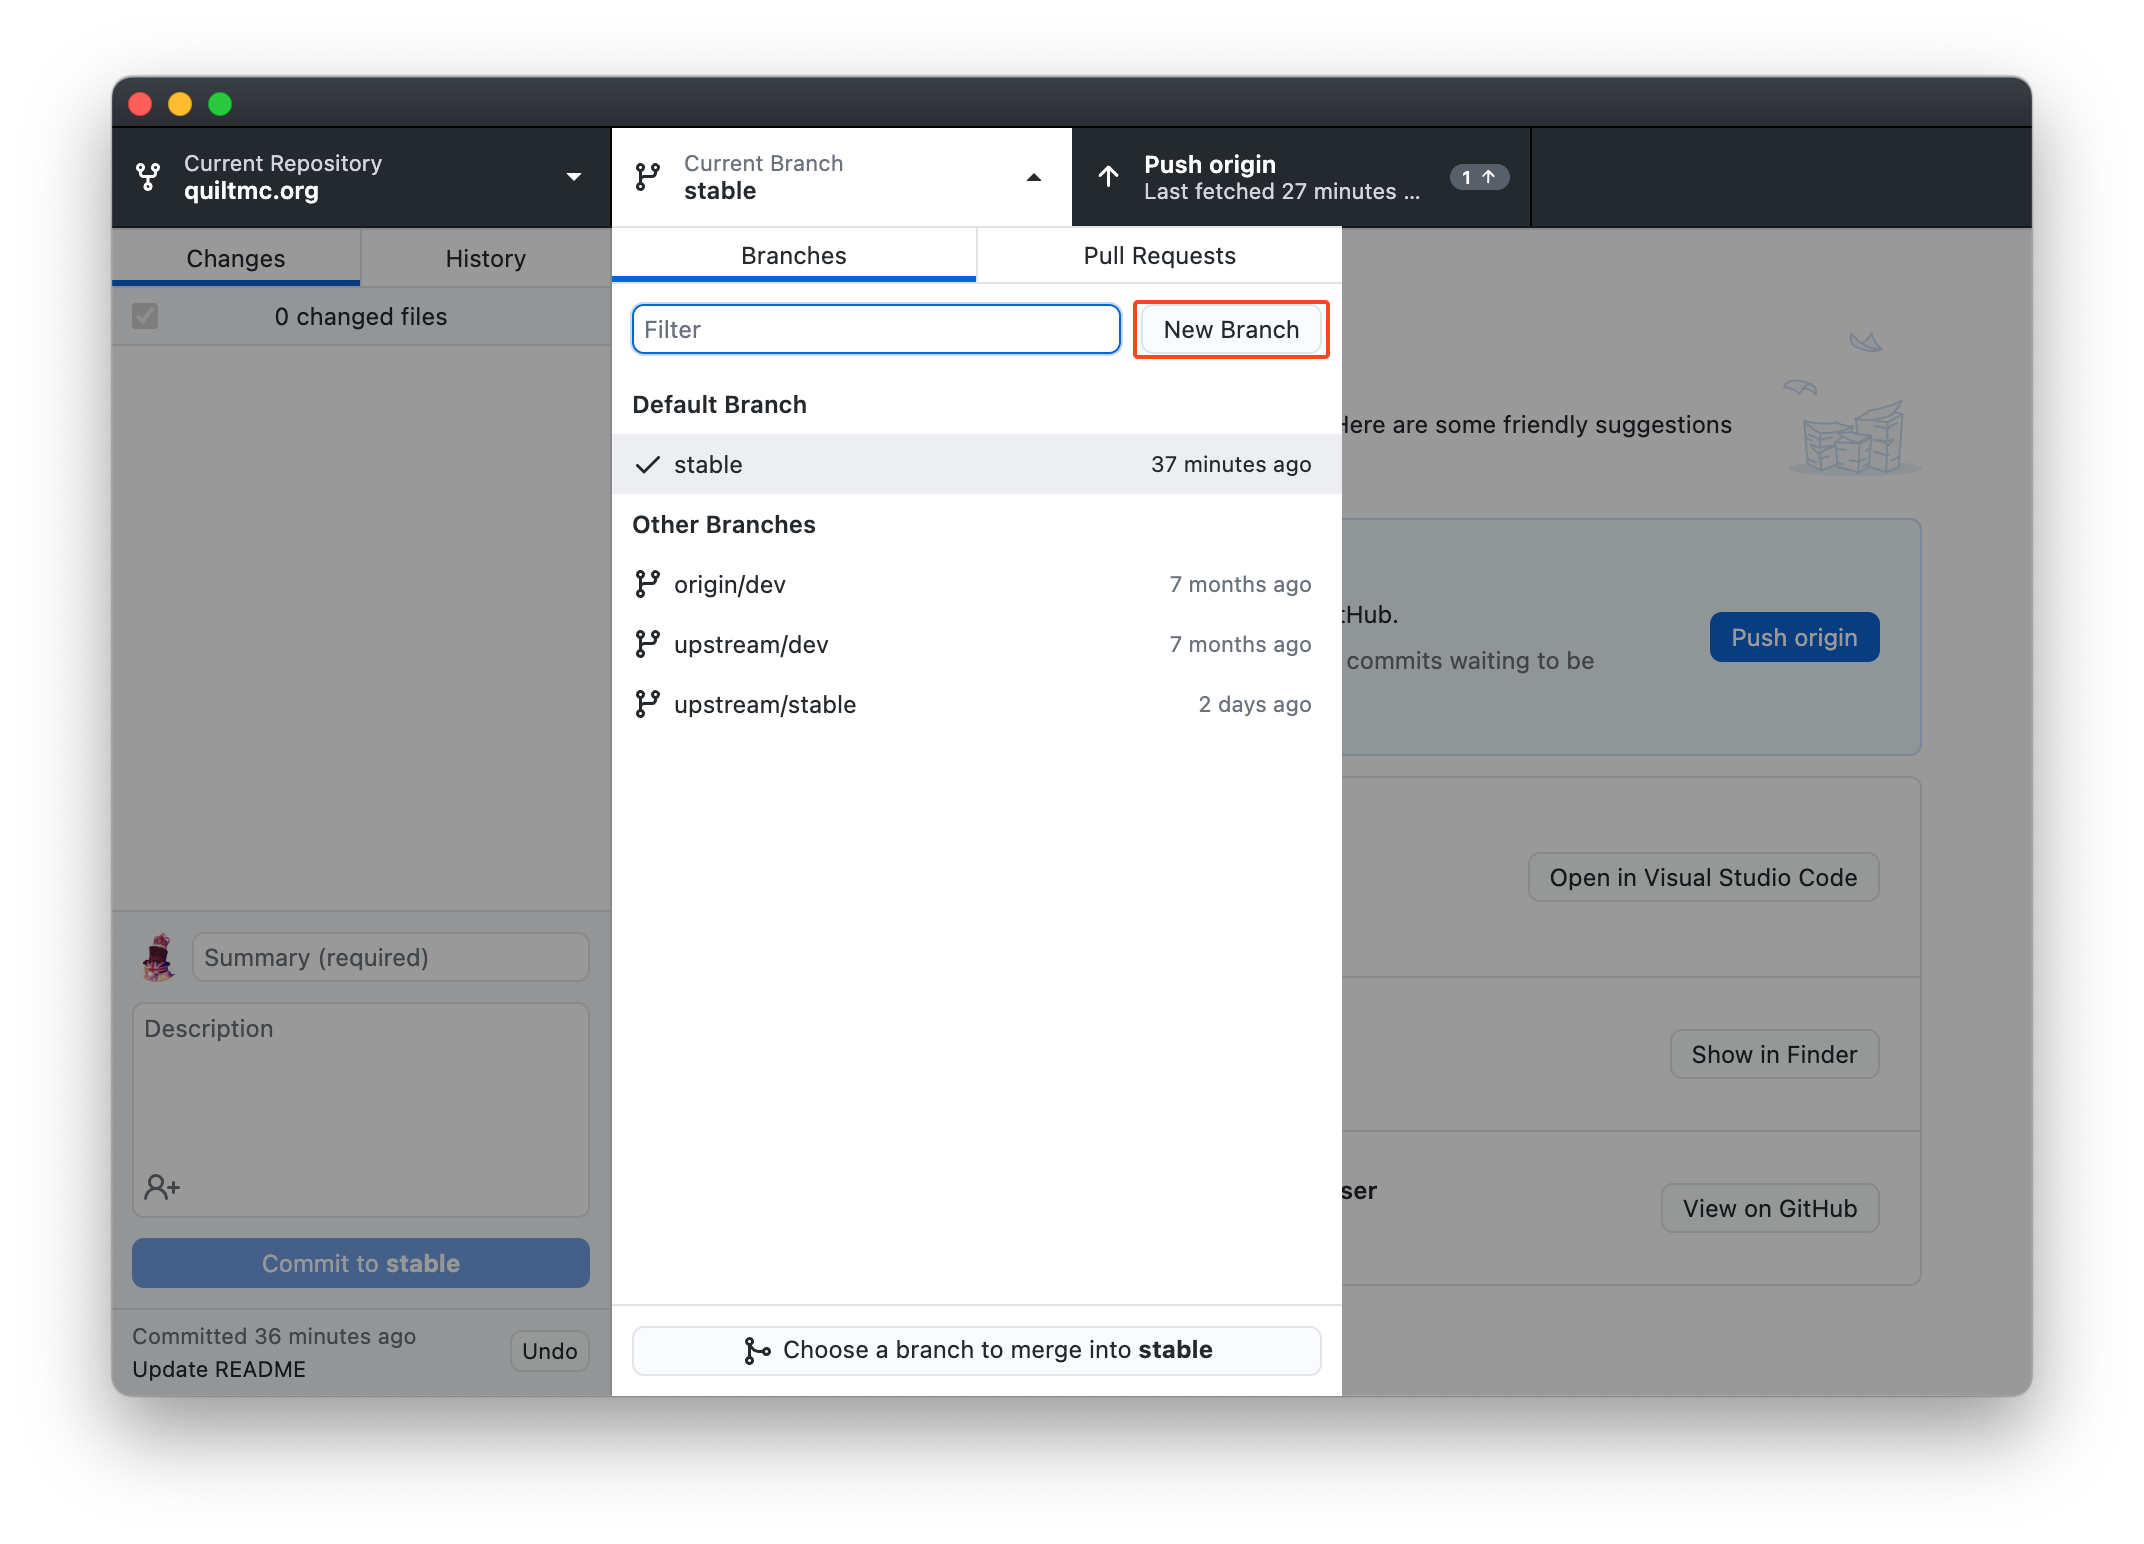 In github.dev, there’s a small button in the bottom-left next to the green GitHub text. Click it, and click “Create New Branch” to create a new branch.
Pull Requests
The last thing you need to know about Git and GitHub is the concept of Pull Requests. Pull requests are GitHub’s system for sending changes between branches, or, more importantly, from a fork of a repository back to the original one. To create a Pull Request, visit your fork on GitHub, click current branch in the top left, and select the branch with your changes to switch to it.

Then click “Contribute” and then click “Create Pull Request”. More information about what you need to include in your Pull Requests can be found further down the page.
And that is the basics of how to use git and GitHub. If you’re interested in learning more about how git works, there is an excellent visual tutorial available at https://learngitbranching.js.org. If you get stuck, don’t be afraid to ask for help on Discord.
Finding Something to Contribute
The following Quilt projects are accepting code Pull Requests for Hacktoberfest and Modtoberfest:
- Chasm
- Developer Wiki
- Enigma
- Mappings Hasher
- Quilt Loom
- quiltmc.org
- Quilted Fabric API
- Quiltflower
- Quilt Mappings
- Quilt Standard Libraries
In addition, the following Quilt projects are accepting low or non-code Pull Requests for Hacktoberfest:
- Developer Wiki (documentation)
- quiltmc.org (Translation)
After you decide on a repository to contribute to, a great place to start is by looking at the Issues tab for something you think you could help with, unless you already have something in mind. If you find something that you think you can do, please leave a comment stating your intent to work on it, and please clarify any details you’re unsure of before starting work. Likewise, if you’re attempting something that isn’t being tracked in an issue, please confirm that it is something that would be beneficial to the project before you start, either by making an issue on GitHub or chatting to the developers on Discord; we’d hate for your work to go to waste! We will not accept contributions that are obviously low-effort or unhelpful, and PRs will be accepted at the sole discretion of the team responsible for the repository.
Once you know what you’re going to do, make sure to read the contribution guidelines for the repository, which are usually found either in the README or the CONTRIBUTING.md file. These guidelines will not only give you advice for developing the repository locally, but they often also contain information about the appropriate procedures for submitting contributions, as well as code conventions. Contributions that correctly follow procedures and conventions are likely to be reviewed and accepted far more quickly. Some repositories have other contribution-related files that aren’t as obvious, like ARCHITECTURE.md in quiltmc.org, so it’s always advisable to have a good look around before you begin.
Pull Requests
After you’ve finished and tested your work, it’s time to submit it as a Pull Request. All contributions must be submitted as Pull Requests to be tracked by Hacktoberfest and Modfest, including low and non-code ones.
In your Pull Request title, write a short overview of your changes, with more detail in the description. Please make sure to include if you would like your contributions to count toward Hacktoberfest, Modtoberfest, or both. Remember, well-written Pull Requests make everyone’s lives easier, and makes it more likely for your contribution to be reviewed and accepted in a timely fashion.
In case you’re unfamiliar with the Pull Request process, it generally goes like this: After you submit your Pull Request, members of the team responsible for the repository that you’re sending the Pull Request to will look over your work and let you know of anything they want changed before it can be merged into the main repository. To make any changes to the files Pull Request, just commit them to the branch you used to create the Pull Request, and they’ll automatically be added, as long as you remember to push them to GitHub as well.